
Booking rooms and resources using the Scheduling Assistant tool
Please noted: Booking Laptop Trolley New Instruction HERE:
he step-by-step guide below will assist users how to check whether multiple rooms and resources are available.
1. Commence by clicking on 'New Meeting' (ensure to click 'Don't Host Online' if you do not want to see the Teams link below)
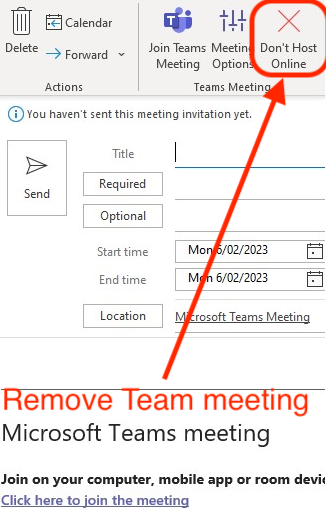
2. Add a Title in the field below, followed by the naming convention:
[Form Number] + [Subject] + [Class] + [Master Initial]
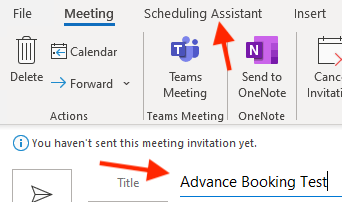
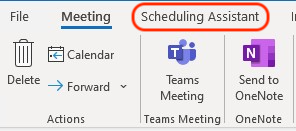
3. Adjust your meeting date and time then click on 'Scheduling Assistant'.
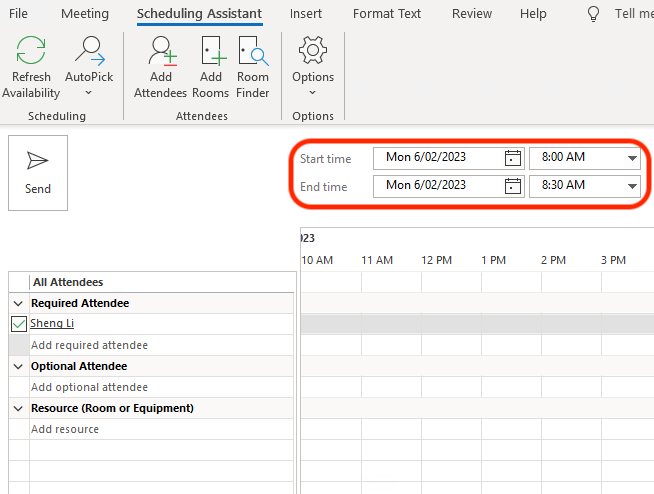
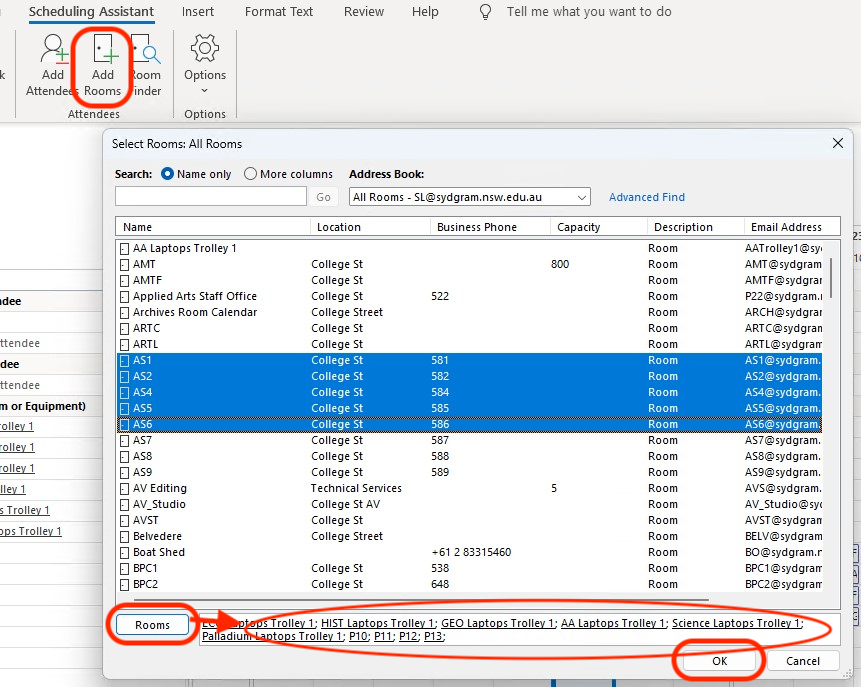
4. Select 'Add Rooms' to add multiple rooms and trolleys to view their availability. Then click the 'Rooms' button at the bottom of the search window to add the room to the list, then select the OK button.
Tip: To make a multi-selection hold the Shift Key or Ctrl Key and then click on the Room name required
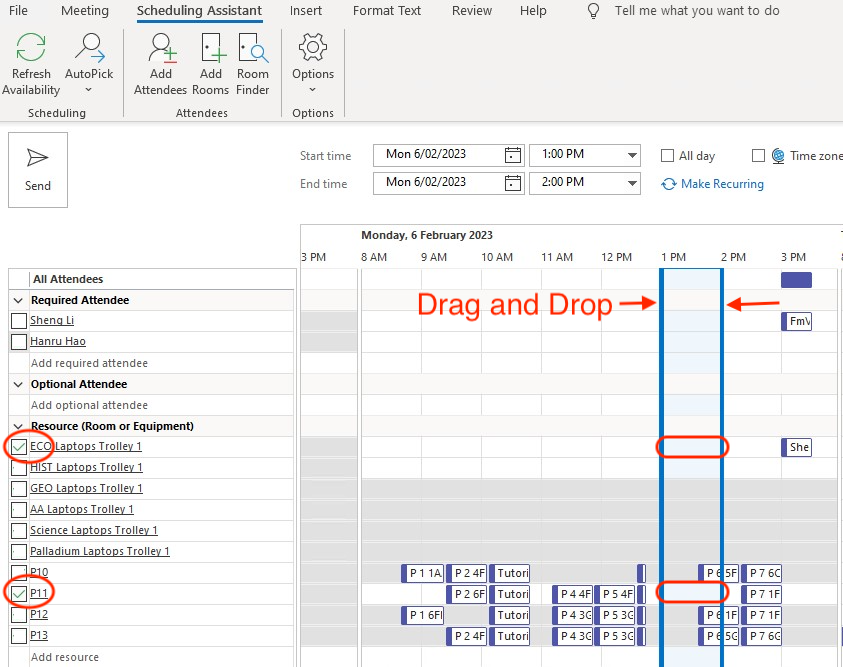
5. You can view the room/resources availability against your outlook calendar. Make a booking by adjusting the start time and end time (drag and drop the blue bar). Please ensure to only tick the room you require and untick any other selected rooms.
6. Make sure you have a name allocated to your booking, then complete the booking by click on the 'Send' button.
7. Laptop trolleys and rooms will sync with the library calendar and the room calendar.
8. If you have an issue or cannot locate a room or trolley, please contact ACJ (Anna Juniper) or FST (Fiona Taylor) for assistance.